on Dec 01, 2021, Updated Jul 03, 2024
More Snack Recipes
Watch the Recipe Video
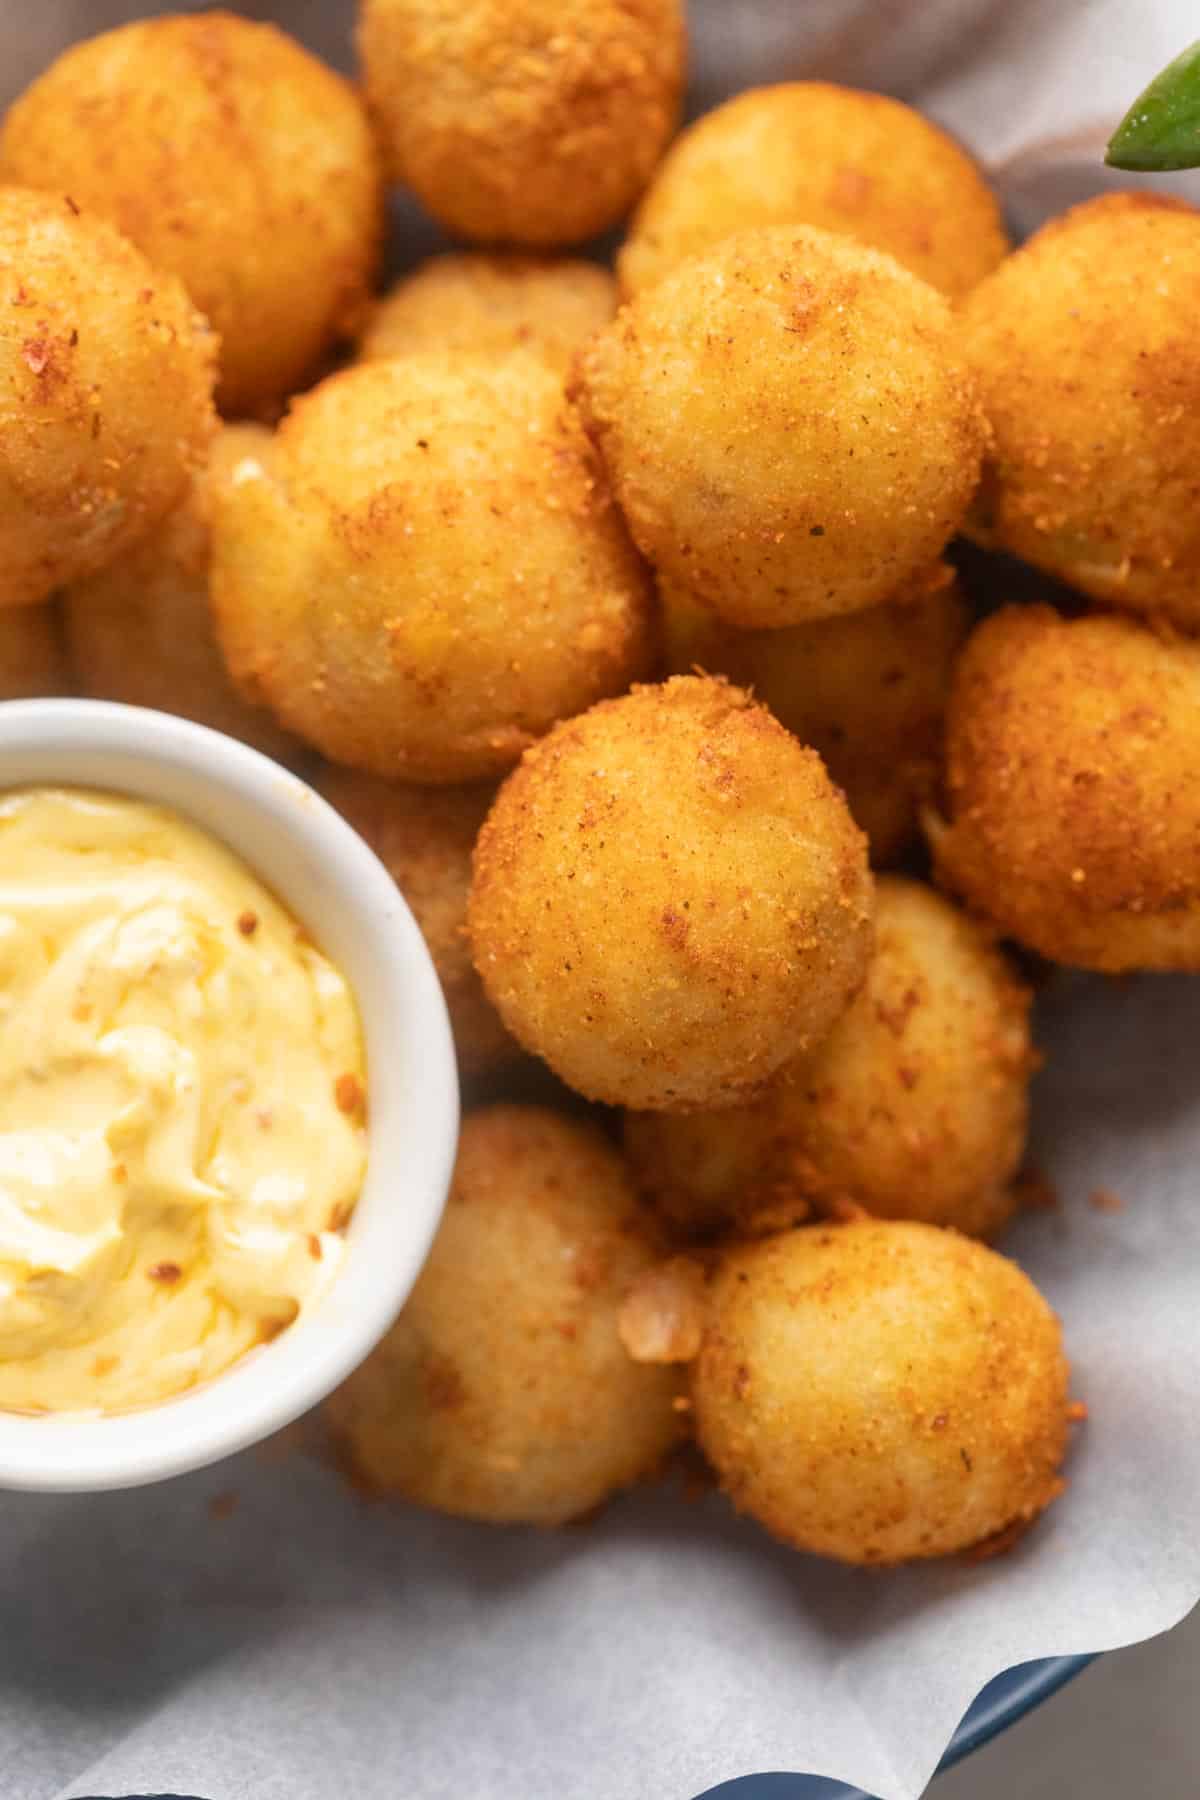
LOVE THIS RECIPE? Subscribe to my newsletter and be the first to receive all new recipes! But that’s why I’ve done all the work for you – tested these over and over again to make sure they are fail proof. Once you get it right, there’s no stopping you from indulging in these crumb-fried balls with an oozy, creamy center. They hit all the right notes, making you fall in love, one cheese-ball at a time. If you’re contemplating making it for game night, or just as an evening snack, think no more! They’re going to be a hit, and here’s why –
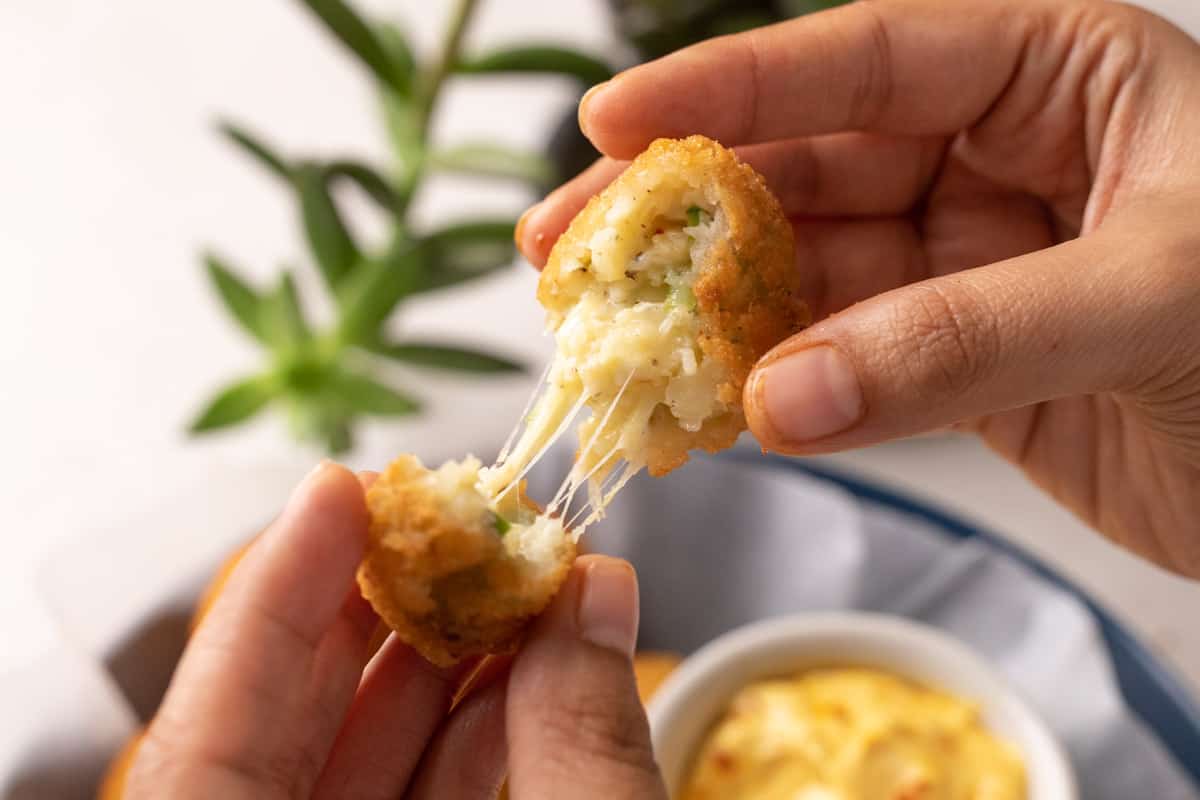
The center is melty, cheesy and gooey – do I need to say more?These cheese balls are flavoured with garlic, Italian seasoning, and have veggies like bell peppers and corn. All of this makes them really tasty!Only 30 minutes from start to finishThe double crumbing technique will make sure they don’t burst open while fryingThey can be frozen easily so you always have a stash of these emergency snacks if guests come over!
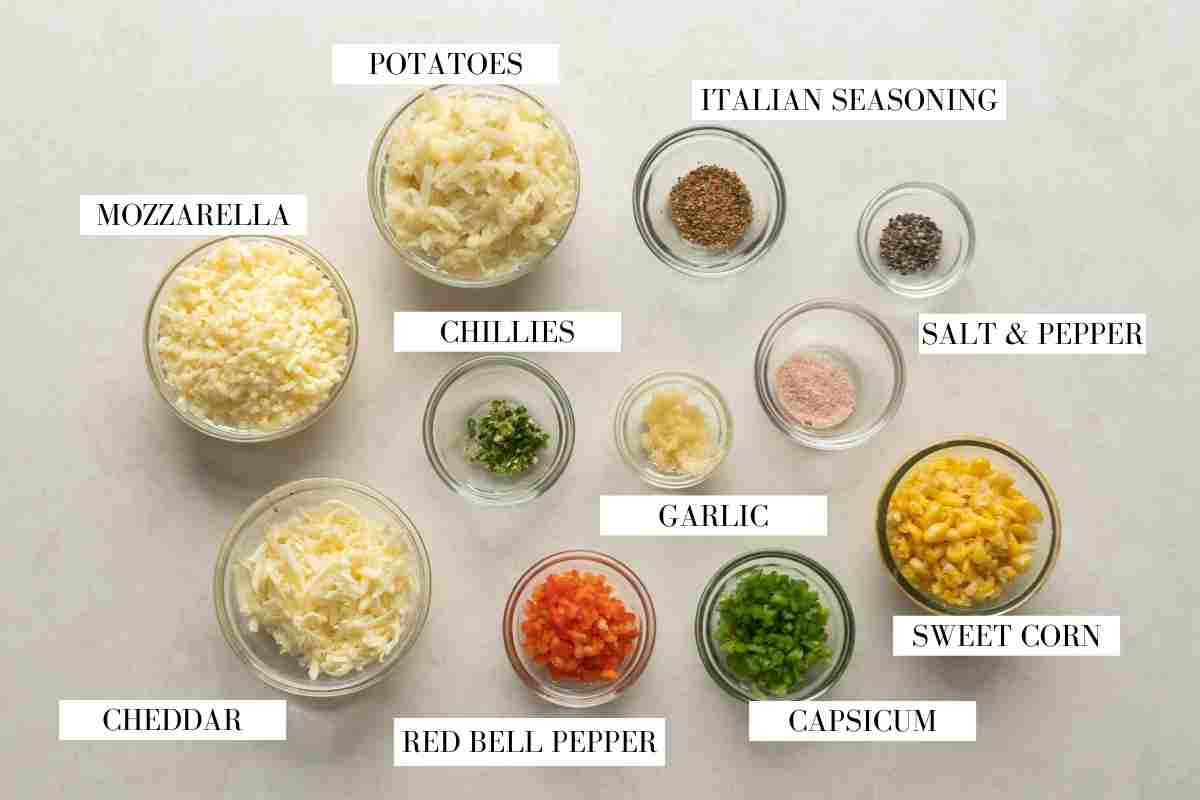
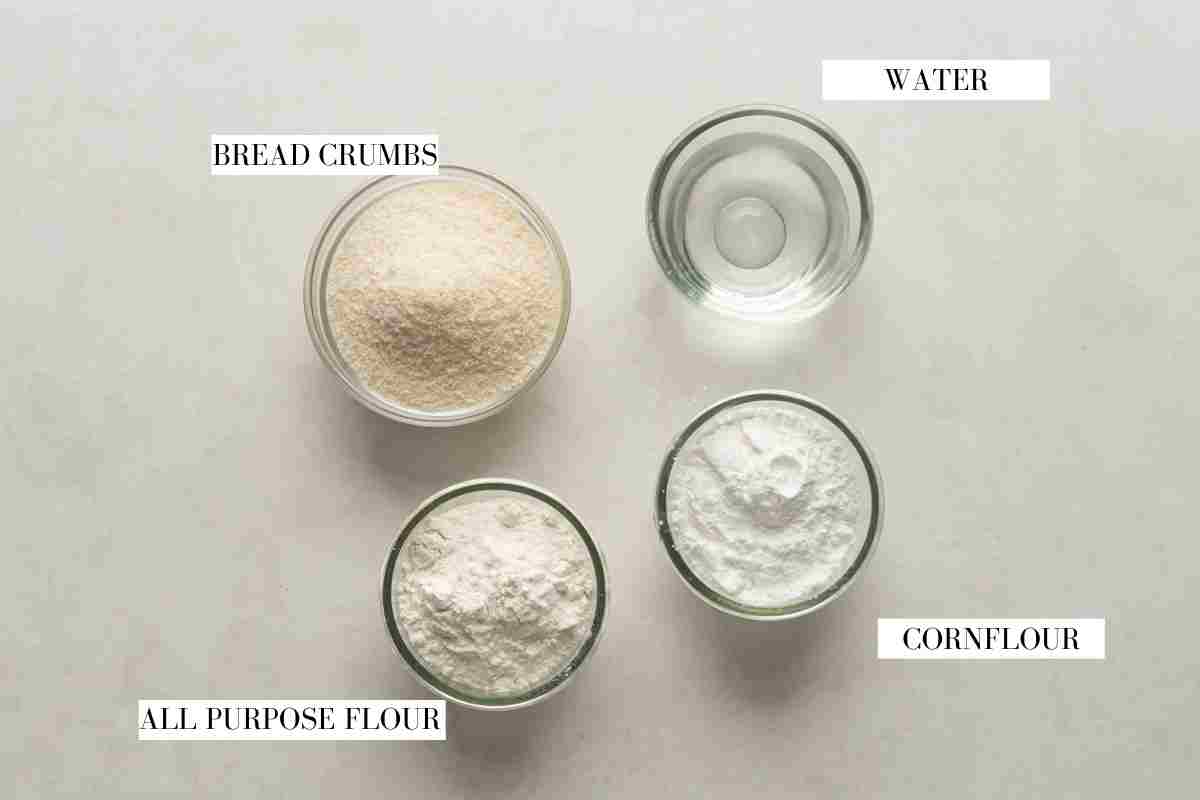
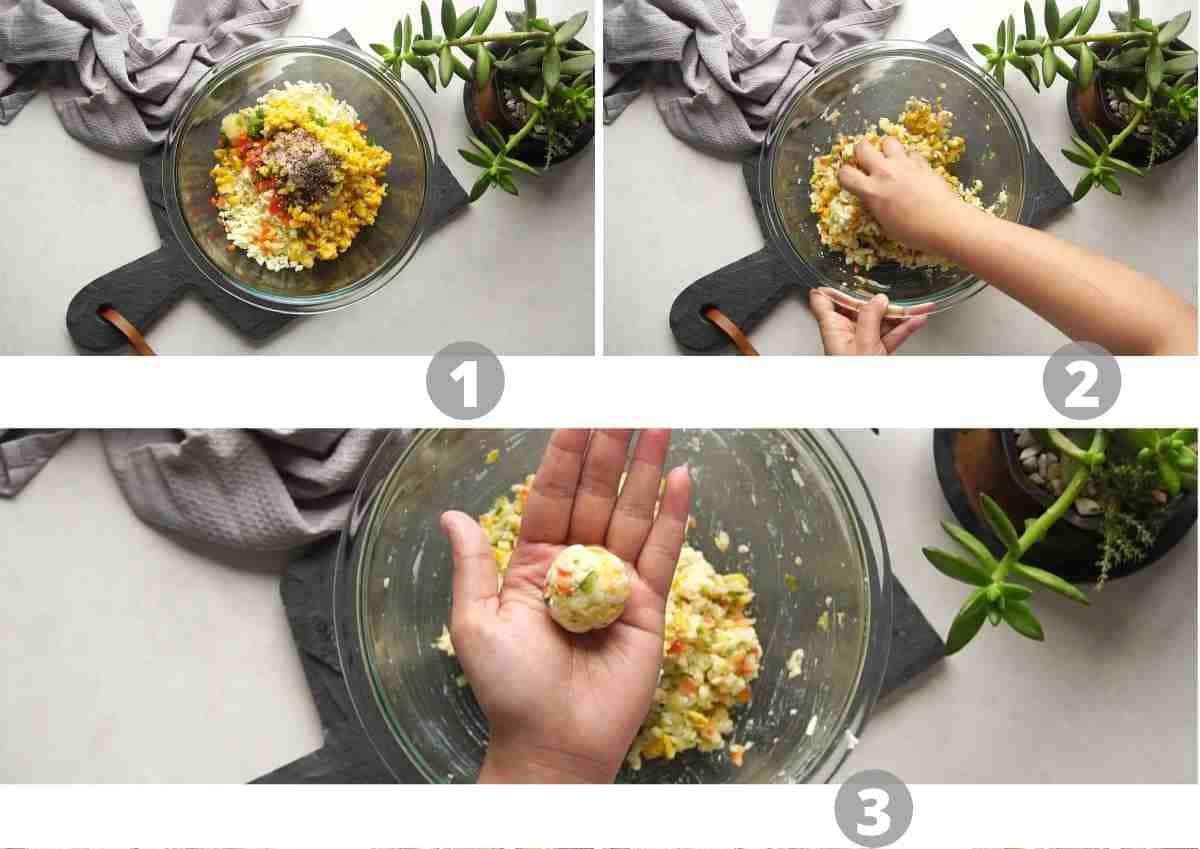
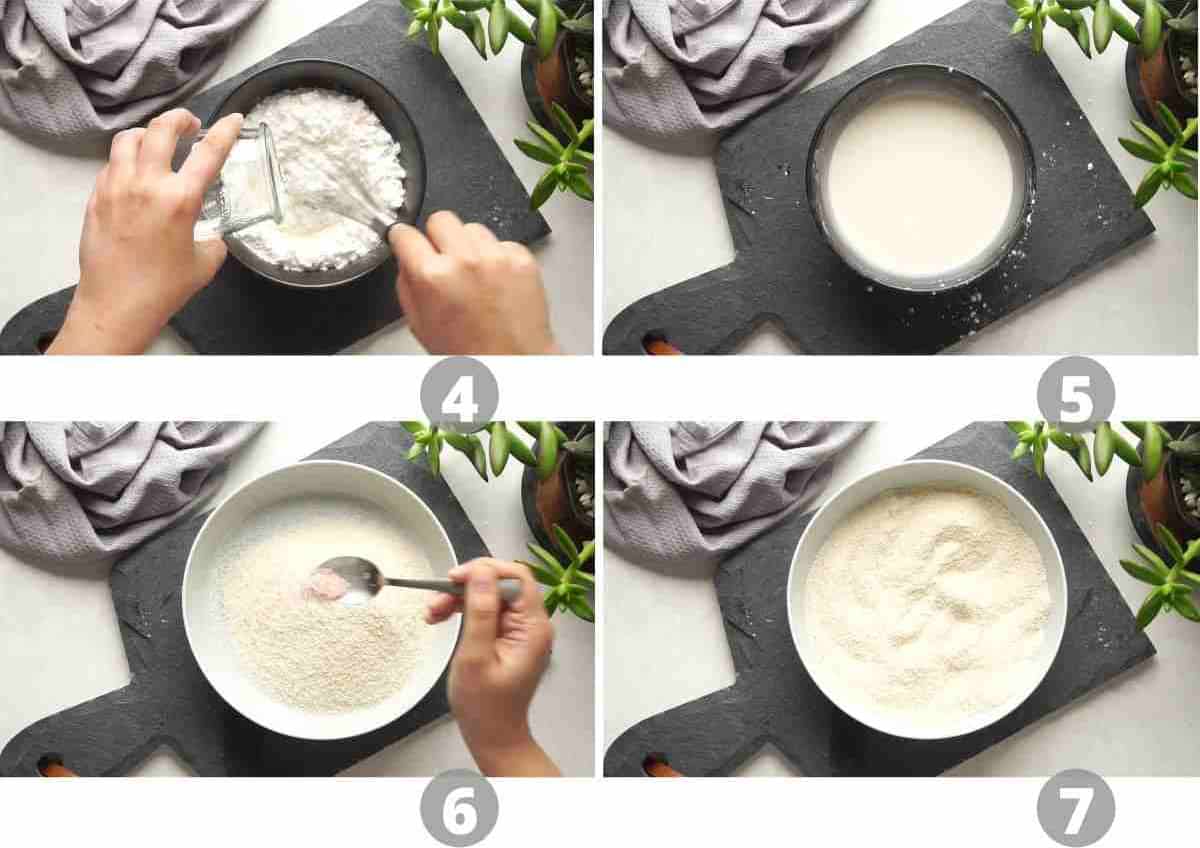
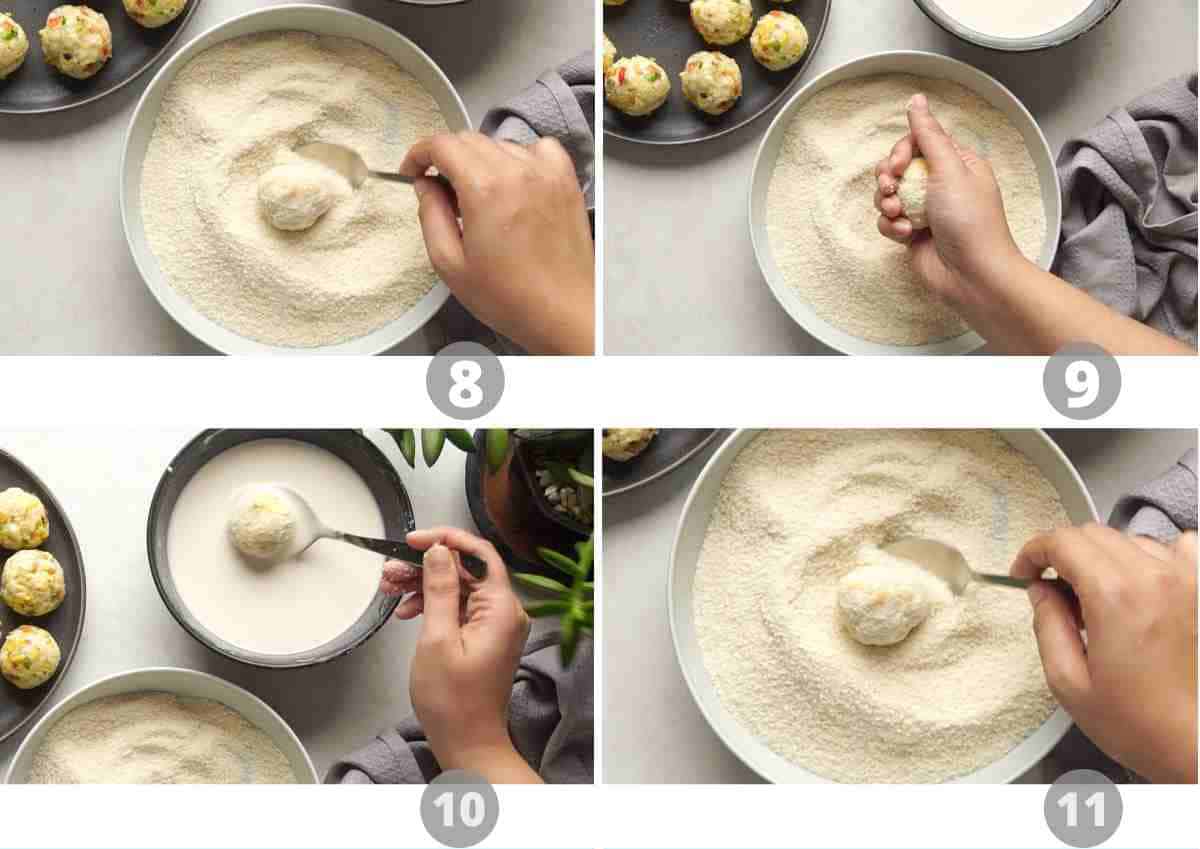
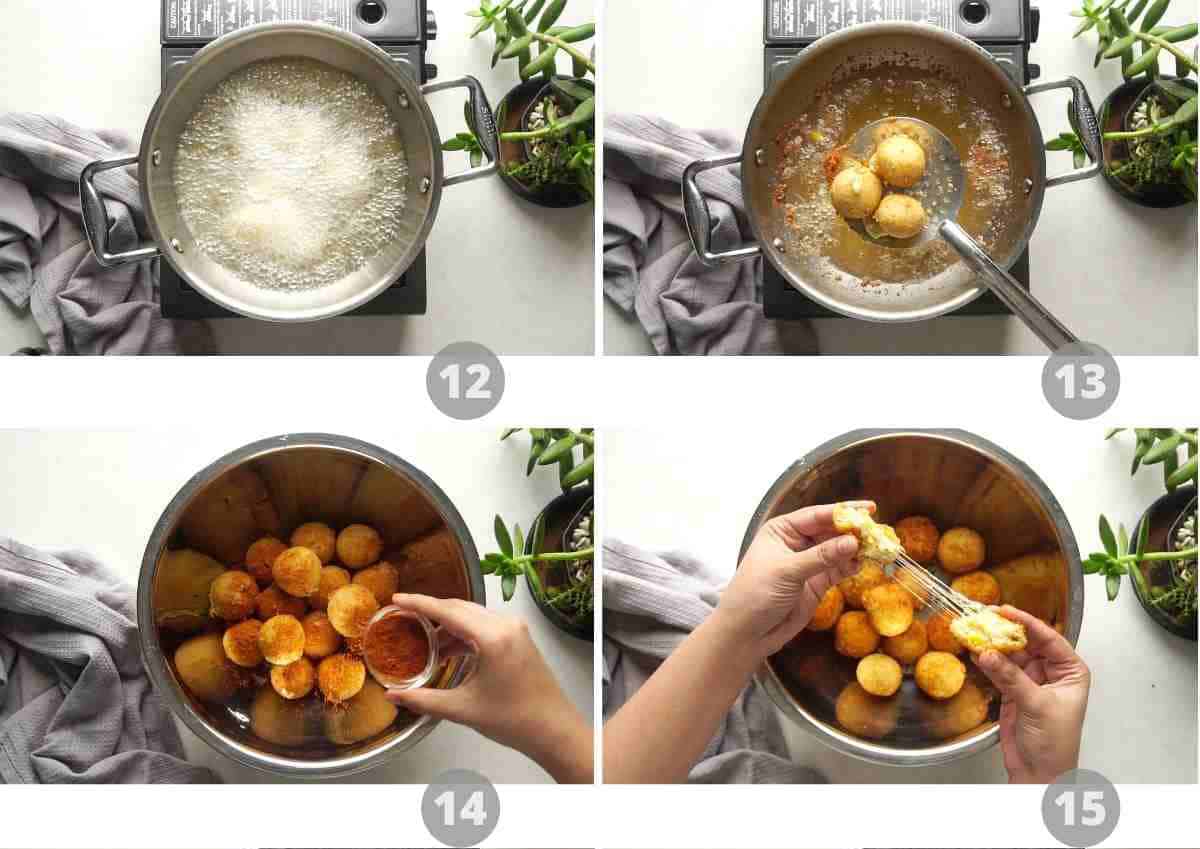
Cheese – A mix of both mozzarella and cheddar cheese gives it the ideal combination of a stringy texture and a creamy flavour. Make sure to use shredded cheese, or cheese cubes cut into tiny pieces as it’s easier to combine with the rest of the ingredients. Veggies – Potato is the star ingredient here! It helps bind the rest of the ingredients together, also blending perfectly with the mozzarella and cheddar, making it the ideal texture to ‘bite into’. Crunchy coloured bell peppers – diced and chopped into small cubes, and some sweet corn for more flavour. Seasoning – Chillies, salt, pepper, Italian seasoning and of course loads of garlic for that extra yum factor. Binding Agents – Cornflour & all-purpose flour to make a slurry that helps with the bread-crumb coating, thus retaining the shape of the cheese ball. Breadcrumbs – You could choose to run leftover bread in the food processor, or pick a packet off a shelf. Breadcrumbs do two things – crumbing and make these crispy 3. Now shape the dough into lime sized balls. Use roughly 2 tbsps of the mix per cheese ball. To ensure they’re of the same size, you could choose to use a measuring scoop or an ice cream scoop too. 5. Nicely whisk the mixture, and make sure there are no lumps. 6. In another bowl, add breadcrumbs and salt. You could also throw in some extra seasoning (chilli flakes or oregano), for added flavour. 7. Mix well. 9. Make sure it’s coated uniformly and press it gently on all sides to make sure the breadcrumbs are sticking to the cheeseball 10. Now, dip the ball in the slurry, and coat on all sides 11. Coat with breadcrumbs again, for double crumbing. This will help retain the shape of the cheese ball while frying. Repeat for all the balls. Once done, refrigerate the cheeseballs for around 20 minutes, as it helps hold their shape better. 13. Deep fry until the outside turns crisp and golden brown. This should take about 2-3 minutes. Once done, scoop them out with a ladle, and place them on a tissue, to soak up the excess oil. 14. This is an extra step which is option but highly recommended – toss them in some peri peri or a spicy seasoning of your choice. Dig in while they are still hot! These are SOOO good I always make a double batch so that I can save them in the freezer for later! Because the family is always asking – they are a Sunday favourite. I like to serve them with a pickle dip – basically mayo, yogurt and some pickle oil (preferably lime pickle). Super simple, but it’s my ‘secret sauce’ to take these over the top!
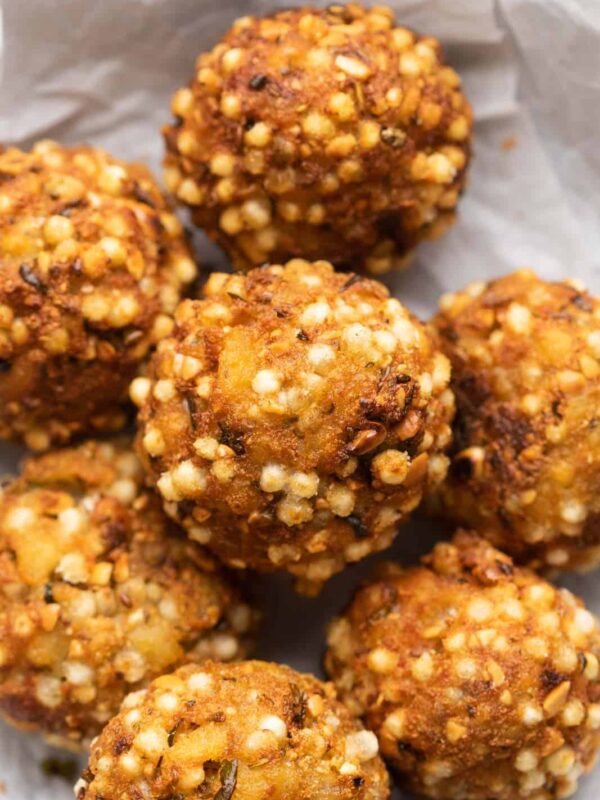
Sabudana Vada stuffed with Paneer
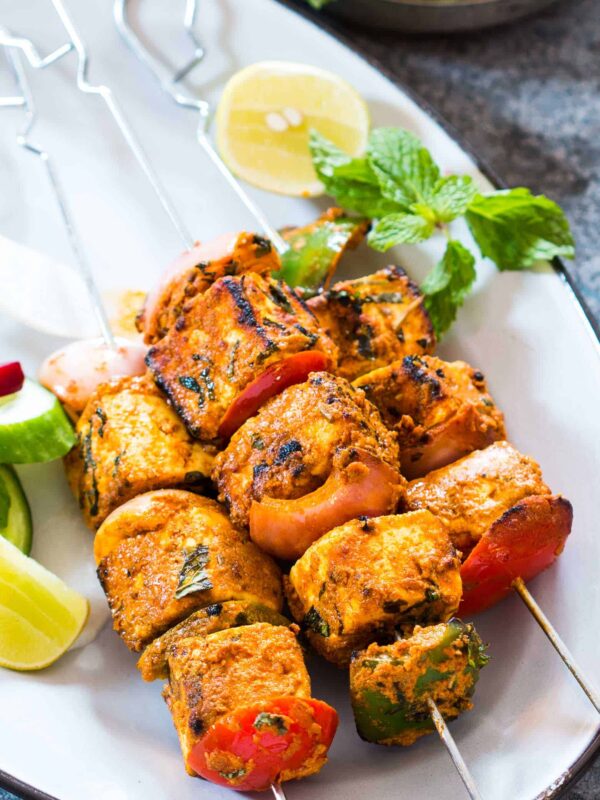
Tandoori Paneer Tikka in the Oven
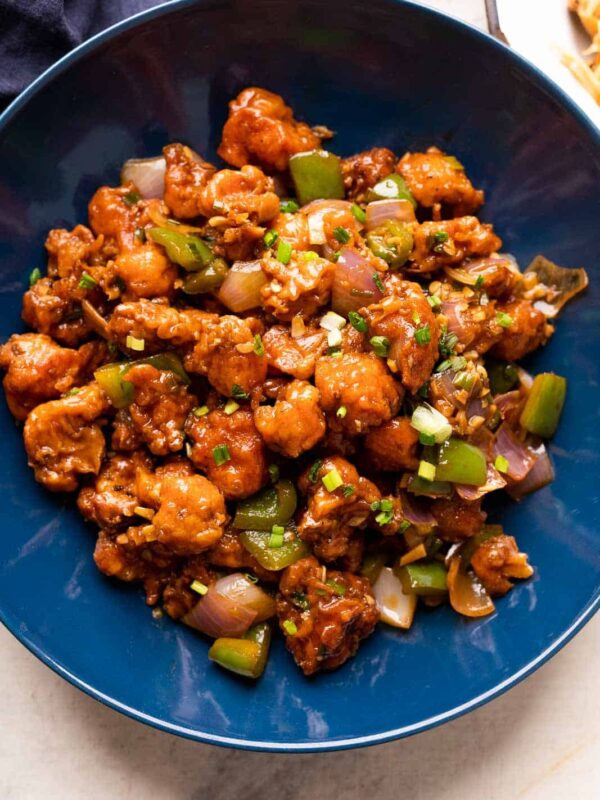
Easy Gobi Manchurian (Cauliflower Manchurian)
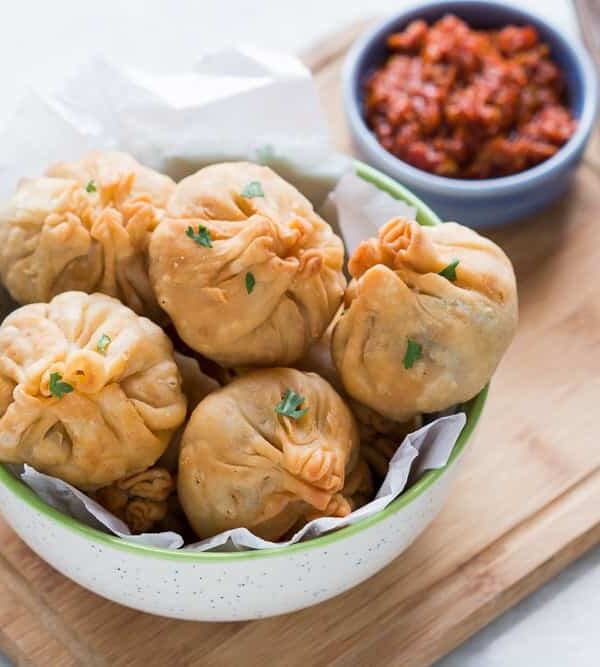
Chinese Potli Samosa Wontons