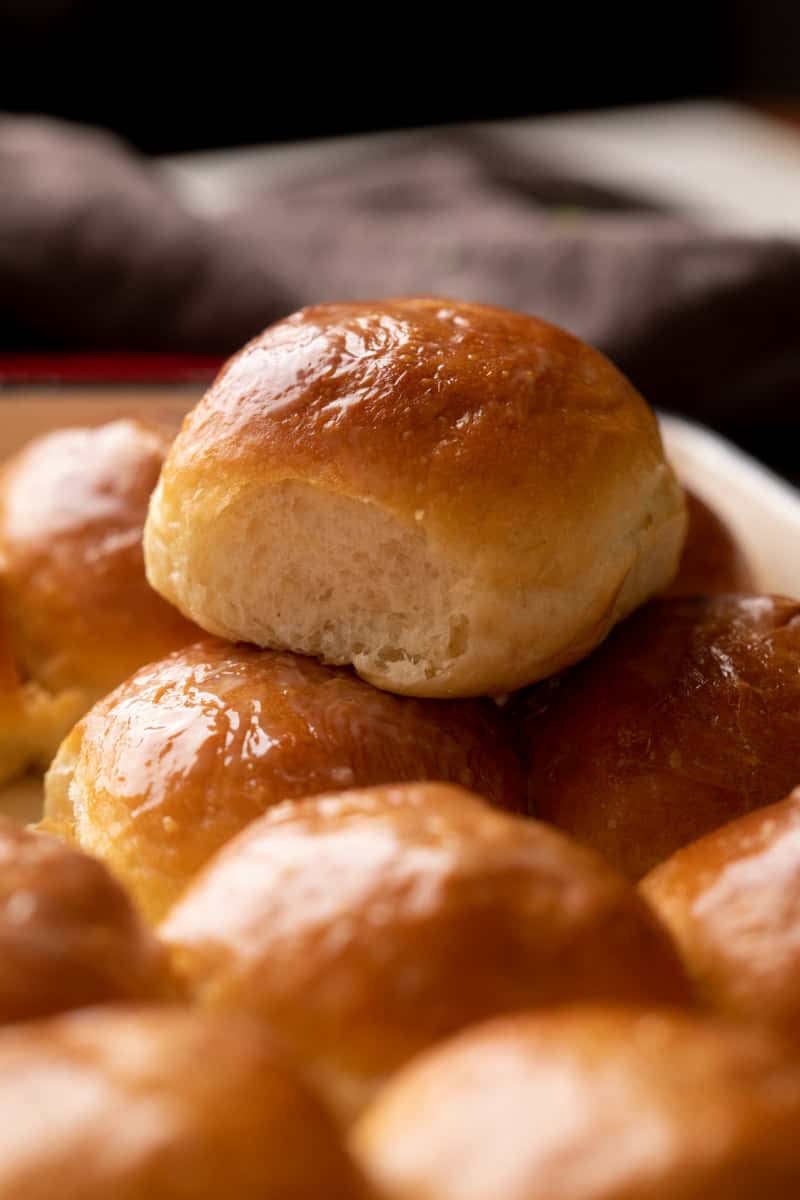
on Oct 01, 2021, Updated Oct 14, 2021 We call them ladi pav, the Americans call these dinner rolls and somewhere else they are just called buns or bread rolls. Whatever name you use, these will absolutely blow your mind because they are:
Incredibly soft and fluffyBeautifully golden on topButtery and richMelt in your mouth delicious and the perfect side dish for stews, gravies, pav bhaji, misal pav or sandwiches
What is Ladi Pav
Ladi Pav basically translates to buns (pav) in one single line (ladi). They get their name from the way they are baked which is in a large baking pan with multiple lines (ladis) of bread (pav). I think they originated in Bombay where they are baked fresh in bakeries in large aluminium trays and are used throughout the day. You can start your day with bun maska and cutting chai, have a vada pav as a snack and then have pav bhaji for a meal. I can live on these!
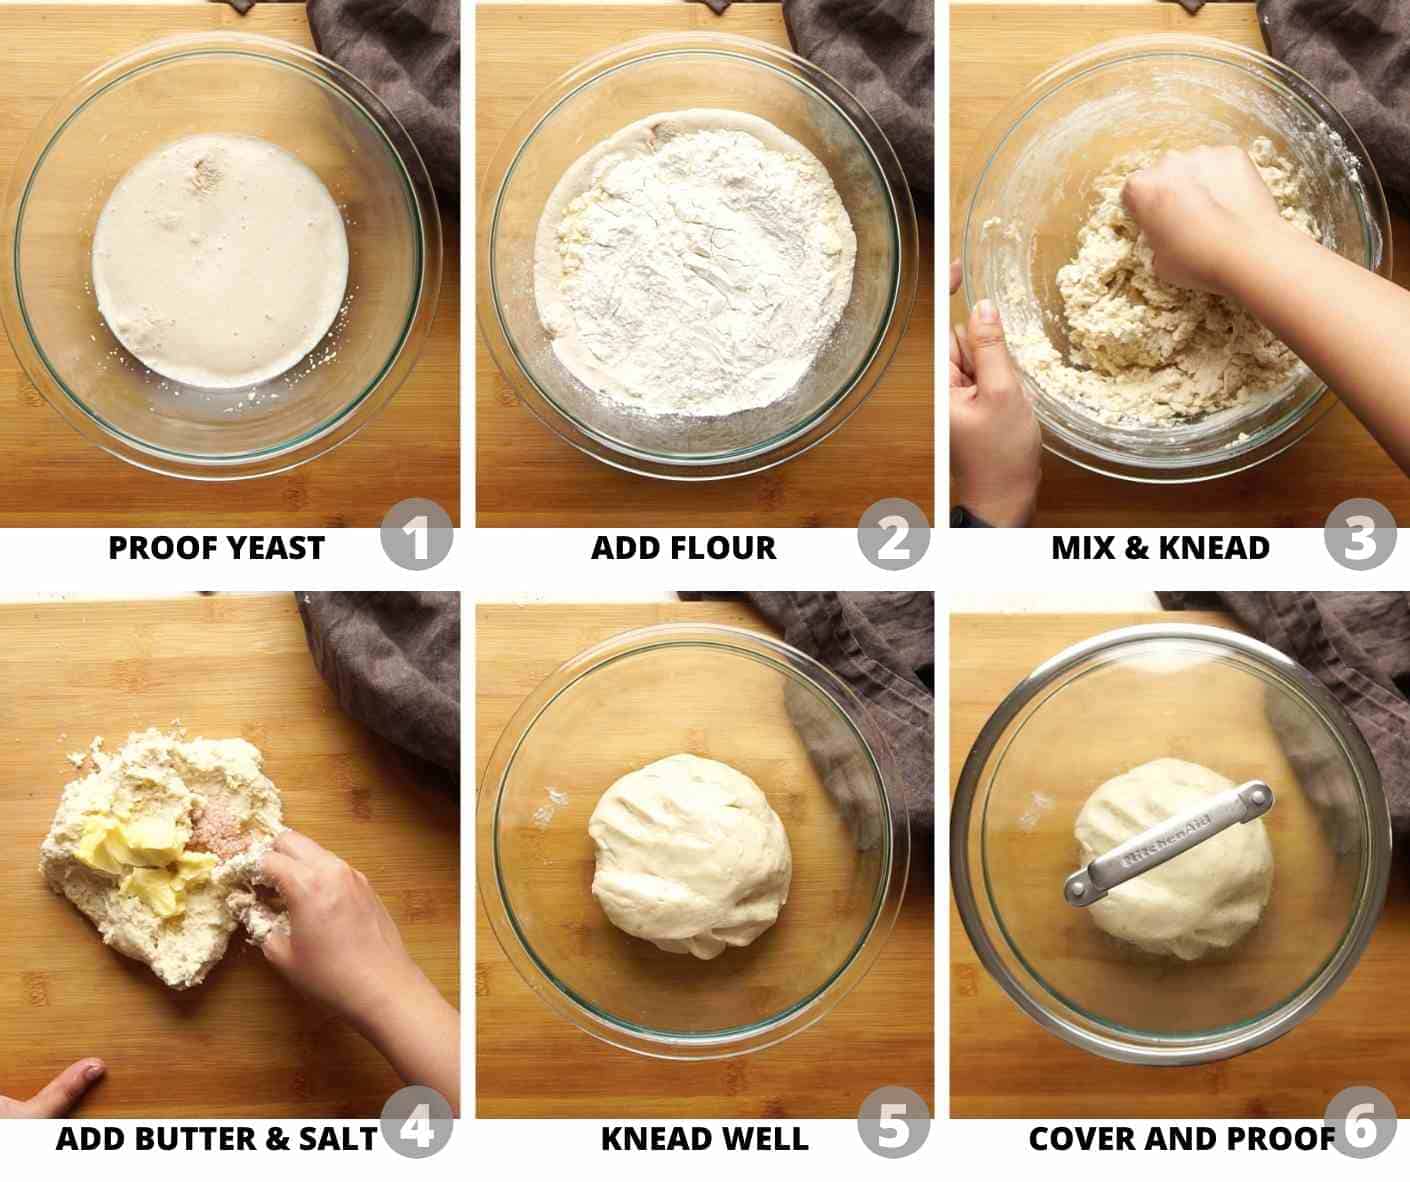
How to make Ladi Pav + Ingredients
Here’s everything you need to make this recipe. This recipe only needs 7 ingredients.
All Purpose Flour (Maida): The base ingredient for most bread recipes. Helps keep the bread soft and develops gluten. You can use a combination of whole wheat flour (atta) and all purpose flour (maida) but I don’t recommend using more than 30% whole wheat flour because it’ll make these pavs too denseSugar: Food for the yeast and flavour for the bread. It helps activate yeast. You won’t get the same results if you don’t use sugarYeast: I’ve used Active Dry Yeast in this recipe. Like the name says, it needs to be activated in lukewarm water or milk and sugar. Takes between 5-10 minutes to activate. You can also use the same quantity of instant yeast but the rise times may differ slightlyButter: These dinner rolls are buttery because of the butter. My butter of choice – salted Amul butter for this recipeMilk Powder: Helps make the best soft, adds flavour and fatMilk: Milk makes a softer dough, adds sugar, fat and liquid to this recipe. Can be replaced with water but the results will be slightly different. Milk is also used in this recipe as a wash to brush the dough before baking. This helps give the buns their distinct golden brown colour on the topSalt: Flavour flavour flavour because there’s no flavour without seasoning
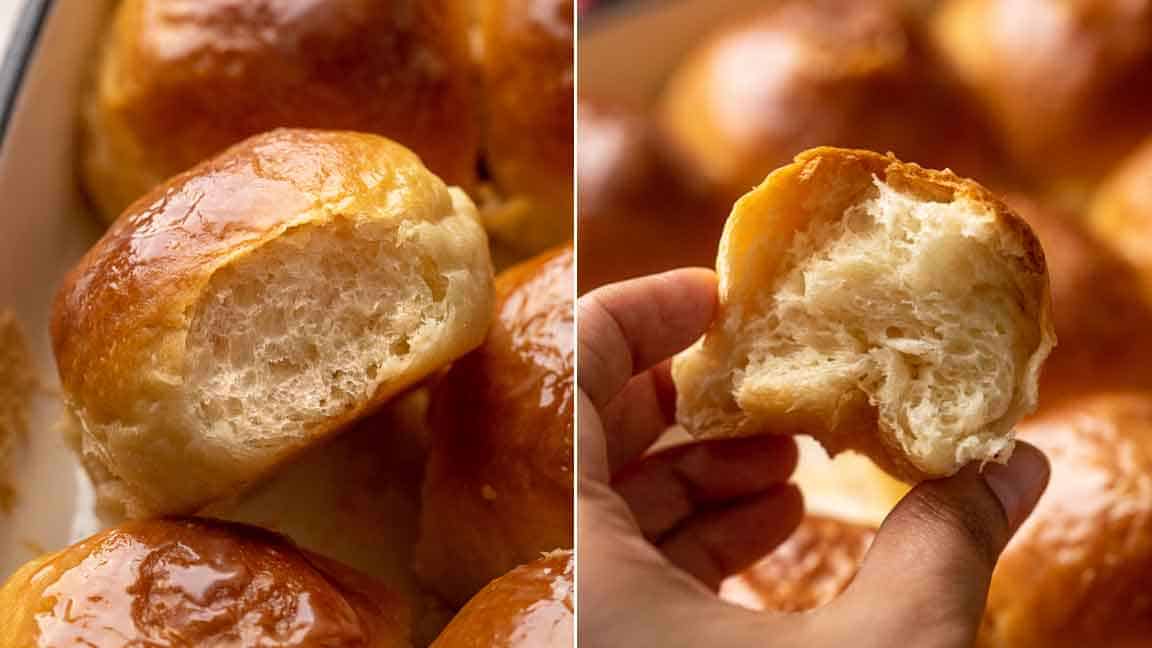
You can also proof the dough in an instant pot which will do the job in 30 minutes! Read my tutorial to proof bread in an Instant Pot These ladi pavs are unreal! The texture is soft, the crumb is airy and the top is a deep golden brown. I make them all the time, even if it’s just for an evening snack. They also make fantastic road trip food and you can turn them into sandwiches.
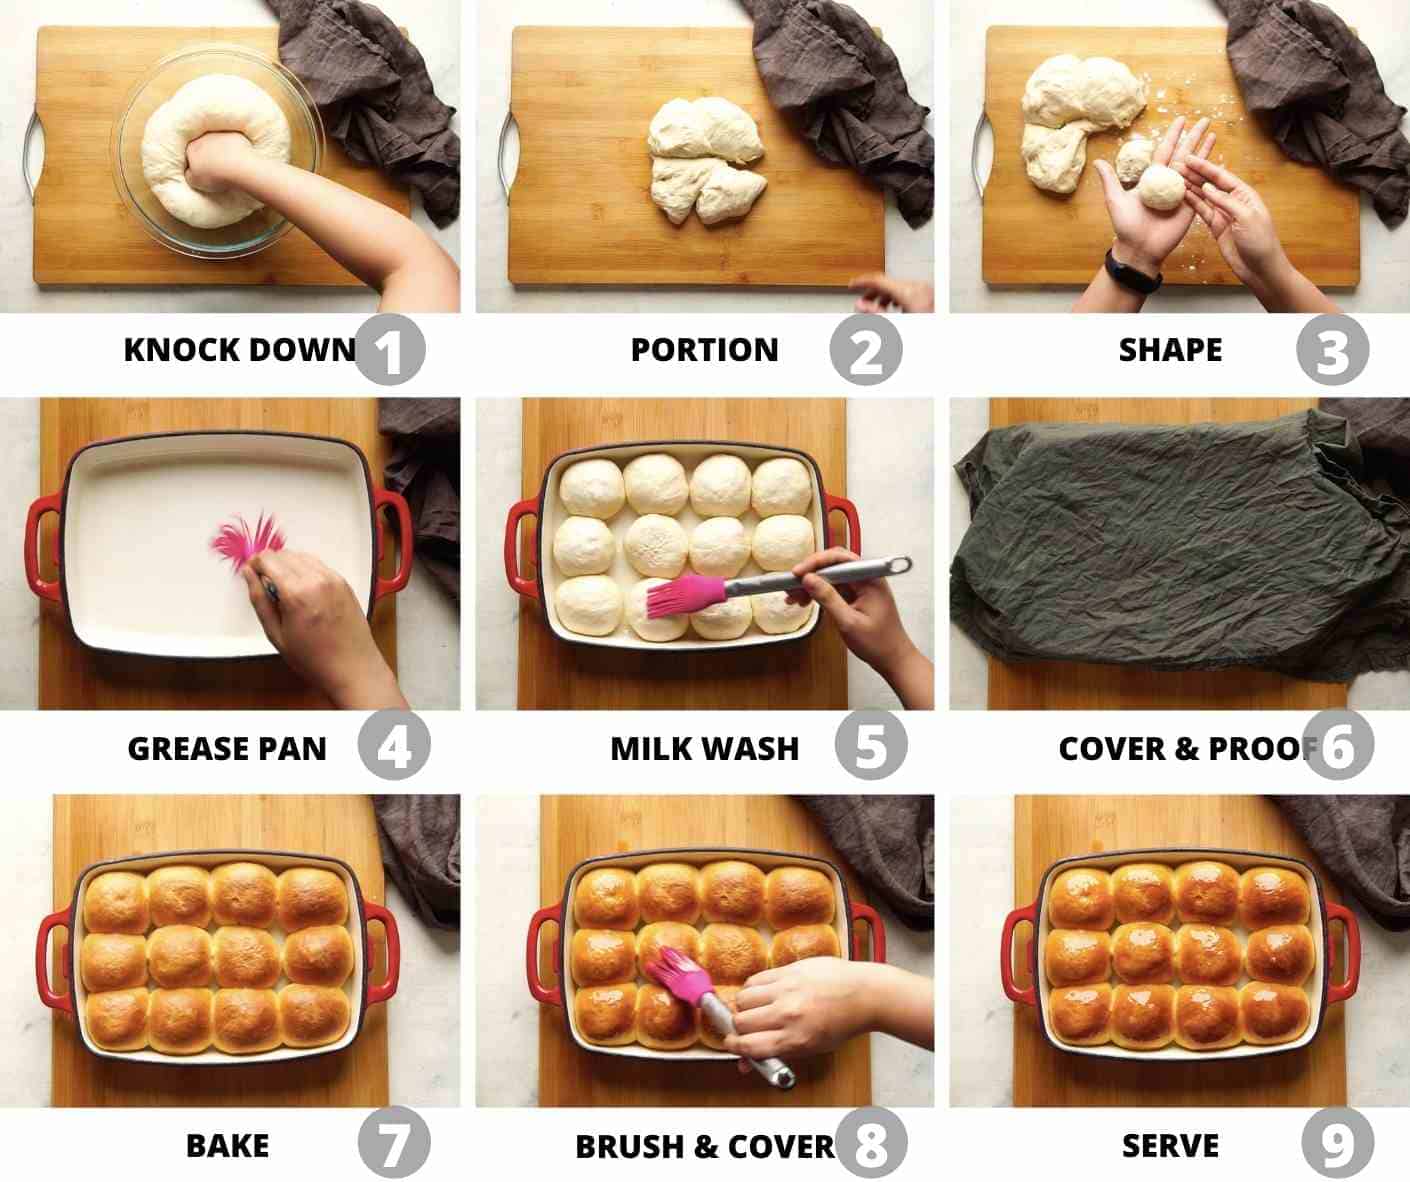
Richa’s Top Tips to make the best Ladi Pav
Make sure yeast is active: This is the first step and the first test. Make sure you are using good quality yeast. In India brands like eagle or butterfly don’t have consistently good yeast. I recommend Urban Platter Active Dry Yeast. Activate the yeast to make sure it’s alive and kicking! Don’t be scared of the dough: This is a high hydration dough which means its got a lot of liquid in it. Which makes it sticky and tacky and difficult to handle. Invest in a bench scraper or use a really blunt knife (one you know will not hurt you) and use it to scrape the dough off the counter and your hands as you knead it Use a stand mixer: I’ve mixed the dough by hands in this video because I wanted to show you how to its done, but if you have a stand mixer, then use it. That’ll make it so much easier to knead this dough Don’t use too much flour: Stick to the measurements in the recipe. You’ll be tempted to add more flour because the dough will feel sticky, but don’t. The more extra flour you add, the more dense your pavs will be. For that perfect crumb and really soft ladi pav don’t add extra flour while kneading Knead well: If kneading by hand, it’s important to knead the dough for 15 minutes till it starts to come together into a ball and it isn’t sticky but remains slightly tacky. If using a stand mixer, 10-12 minutes should do it Shape tightly: Use the shaping technique shown in the video below to shape your balls tightly before baking. This will ensure a smooth top which doesn’t have any bumps and very even looking dinner rolls Use the right baking pan: The size of the baking pan is very important. For this recipe we’ve used a 11 inch x 7 inch baking dish which fits 12 pavs perfectly. Each pav is placed at a distance of 1/4 inch from each other to give them space to rise, in a way that once they bake, the buns are sticking to each other. This gives them the right height and they don’t spread too much or become too flat Preheat your oven: This is more important than everything else. Bread rises properly when it hits a hot oven. Make sure to preheat your oven for 15-20 minutes so that the initial heat gives the dough the lift it needs to bake properly. Place the pan in the middle rack with both elements on Every single time I make these, I’m amazed at how well they turn out! You can also use this same recipe to make burger buns or stuffed buns. For eggless burger buns, place them on a baking tray lined with parchment, at least 1.5 inches apart so that they don’t stick to each other. You can also sprinkle sesame seeds on top for the perfect looking burger buns.
Watch the Video