You have likely eaten roti at an Indian restaurant. But a more homely, whole wheat, unleavened version of this flatbread sits at the center of nearly every regional Indian cuisine, with slight variations and known by many different names, including chapati, poli, rotli and phulka. I have for you a comprehensive, step-by-step guide that will help you make the softest, silkiest, best roti in your own kitchen. To demystify the process, which is rather simple but does require some practice, I’ve included a video that details every step, from kneading the dough to rolling out and roasting the rotis. I’ve also included instructions for making ghadichi poli, a nifty folding technique that creates the softest rotis ever.
What is roti?
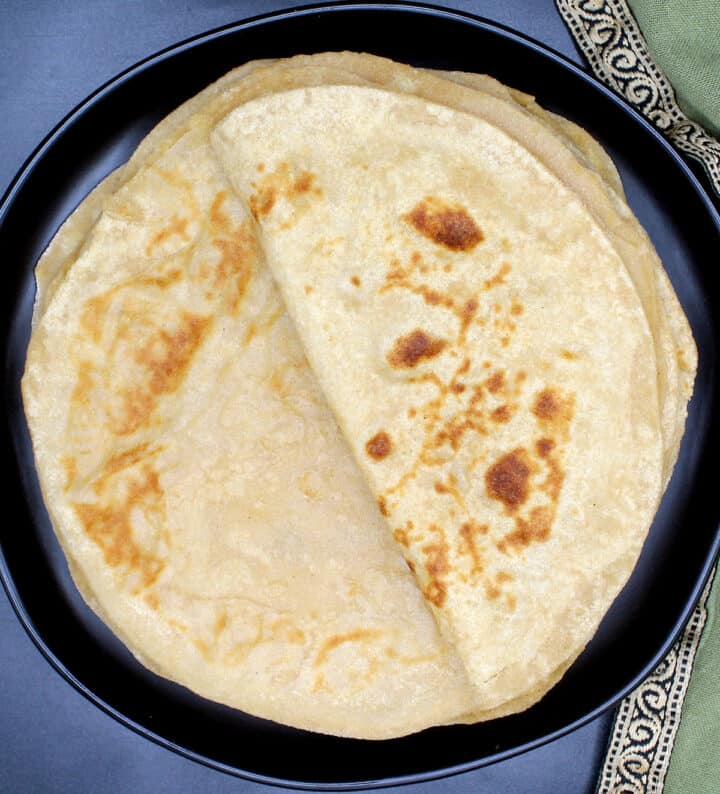
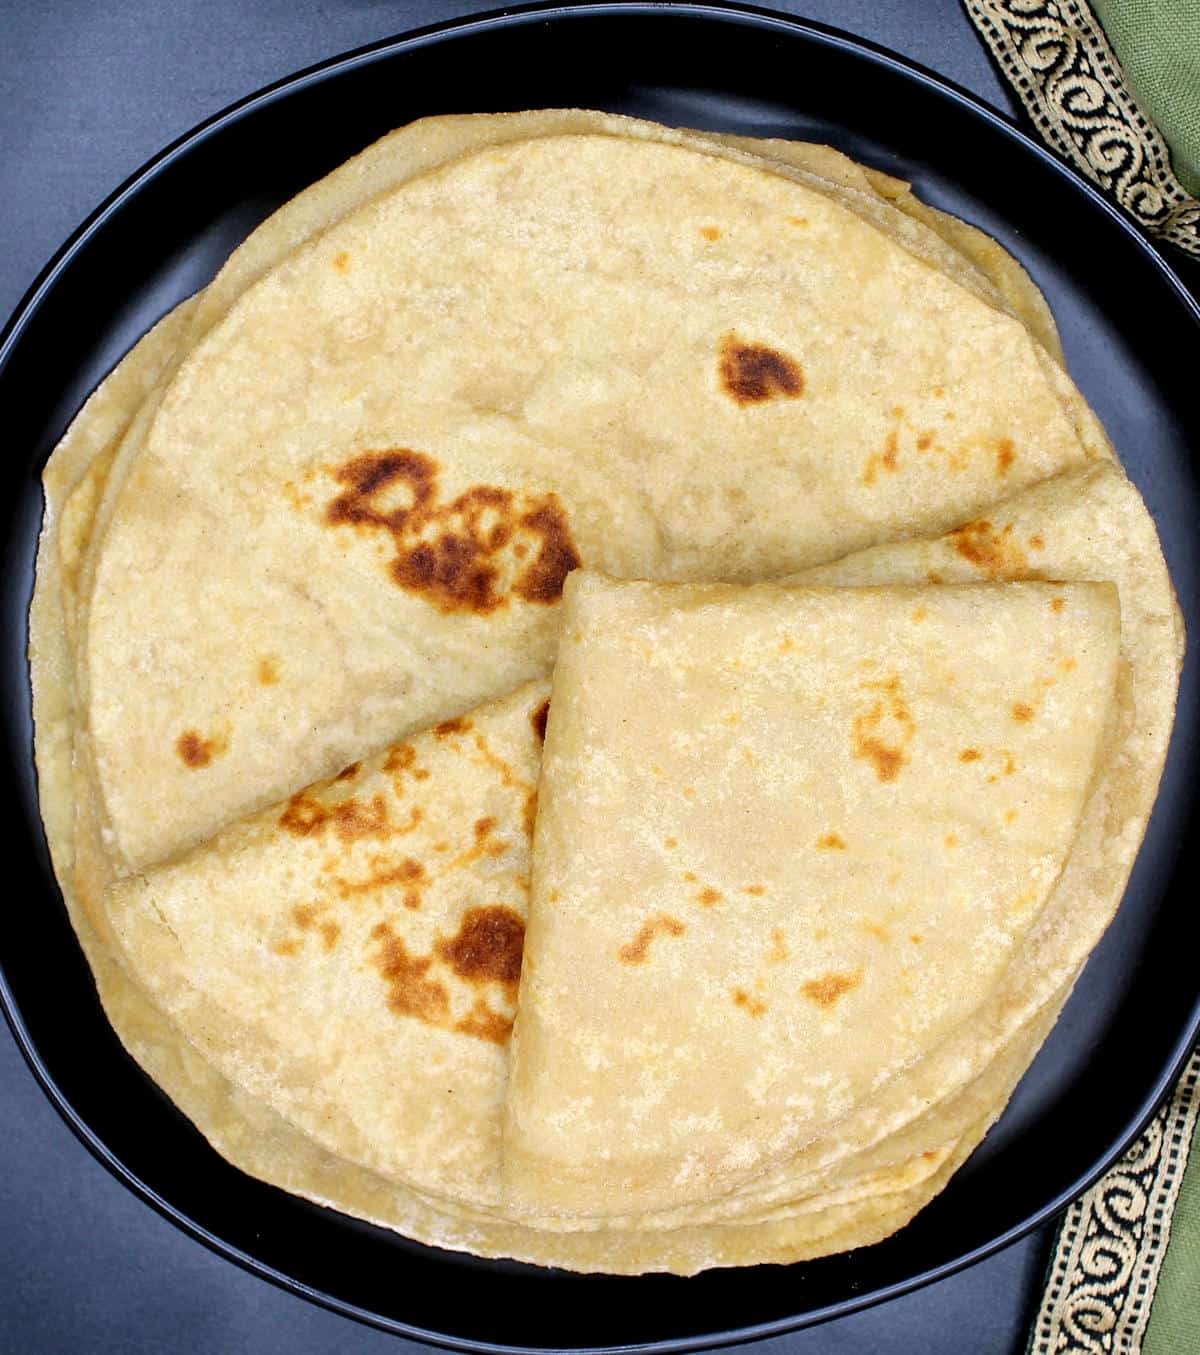
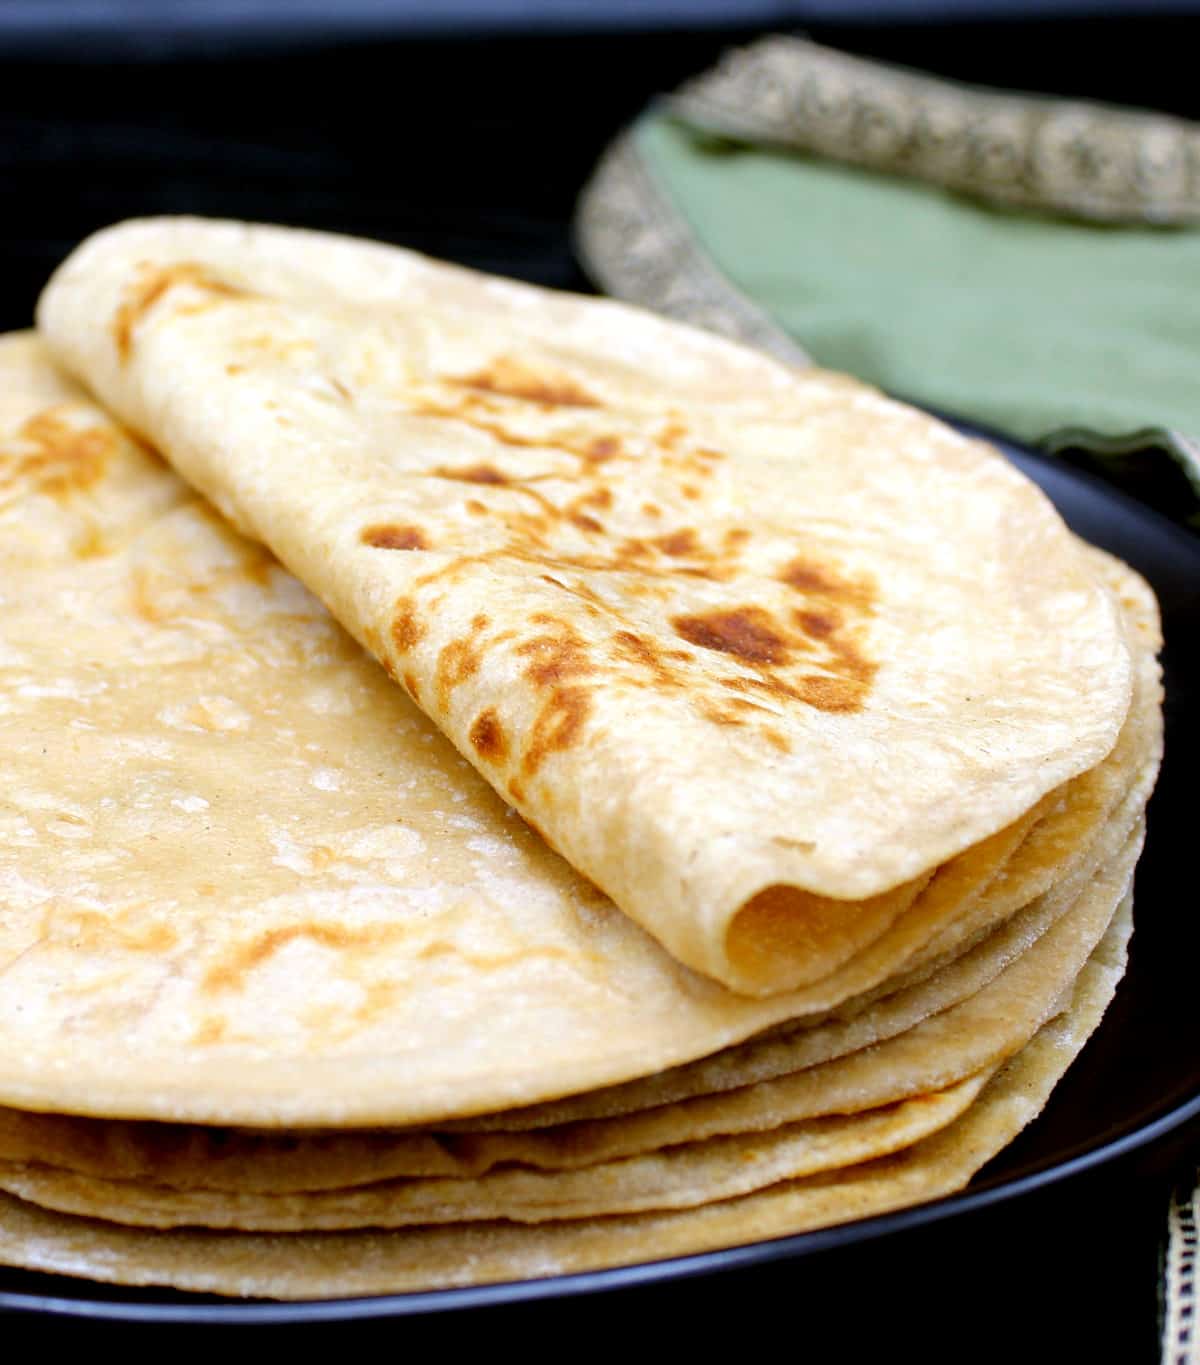
Roti is an Indian flatbread used to scoop up Indian dals, sabzis and curries. It is unleavened, unlike another Indian restaurant favorite flatbread, naan. Versions of roti can be found across nearly every cuisine in India. It is such a quintessential food that the very word, roti, is synonymous in Hindi with sustenance. Because a roti is food many Indians eat nearly every day it is meant to be healthy and whole wheat. You could easily mistake it for a wheat tortilla although there are significant differences between the two: tortillas are often made with refined flour, and they are rolled thinner than rotis/chapatis. A well made Indian roti should puff up when roasted, which gives it two or three layers, making it soft and fluffy.
What is the best flour for making roti?
Your first choice for roti should always be whole wheat atta flour (sometimes sold in Indian stores and online as durum wheat atta flour). You can easily buy this online or at an Indian store. (I have added an affiliate link to a brand I sometimes use in the recipe card. I am not wedded to it, I just buy anything that’s on sale at the Indian store. Keep in mind you will get a much better price at an Indian grocery store than you will online.) White whole wheat flour is an okay substitute for atta, although not as good. If you have only regular whole wheat flour, you can use it with decent results but the rotis won’t be as soft because the wheat is not as finely ground. You should never use all purpose flour for rotis, nor should you use bread flour. Rotis made with all purpose flour will quickly become stiff and crackly. And although bread flour has a higher protein content rotis made with it will harden up fairly quickly too, won’t taste authentic, and don’t have the health benefit of whole wheat flour.
Equipment for rolling roti
Rolling pin: Rotis are rolled out using a rolling pin and a small, round block usually made of wood (mine, which you will see in the video, is made of silicone although I do have a wooden one I sometimes use). Together these are called polpat/latne in Marathi, or chakla/belan in Hindi. You don’t need a polpat – any chopping board or clean surface like your kitchen countertop will do. However, you do need a rolling pin, and the one you use to roll out your pie dough, which has ball bearings, won’t work here. Instead you will need a French rolling pin or a tapered, thinner pin you can find online or at an Indian grocery store.With a French or Indian style rolling pin, you have more control: your hands apply pressure to the pin, which transfers pressure to the dough, making it easier to roll the dough into an even circle. With a heavier, pie rolling pin that has ball bearings the pressure is applied by the weight of the pin, making it more suitable for rolling out larger, thicker crusts. Bowl: In India, a large plate with high sides, called a paraat, is used to knead dough, but a large bowl will do just fine. Griddle: To roast the roti, you will need a cast iron or nonstick griddle or skillet. Indians would use a thin griddle called a tava, but a thicker griddle, like a comal used to roast tortillas, works just as well. Spatula: You will also need a flat spatula to flip the rotis (don’t use tongs as they can tear the roti), and a heat-proof brush to coat the roti with oil as it cooks (you can use the bottom of a spoon to spread the oil if you don’t have a brush).
Types of roti
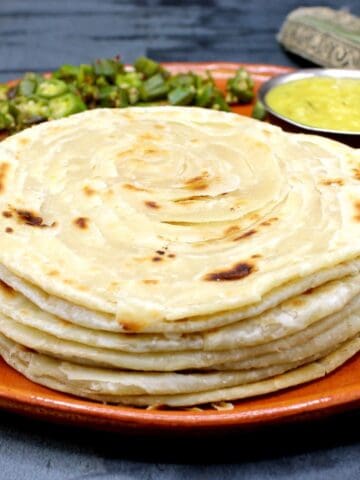
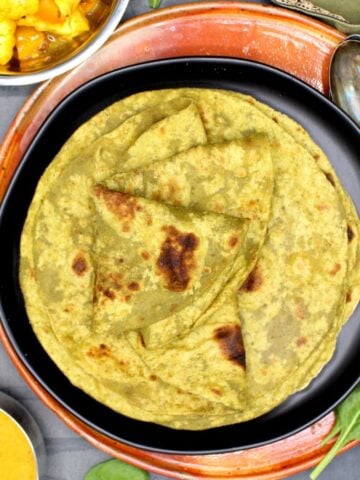
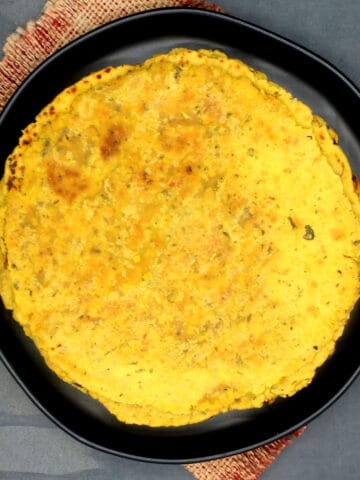
Roti is a catchall used to describe many different types of flatbreads you’d find across India. Here are just a few of them: Phulka: This is a smaller version of a chapati, but it is baked directly over a flame, which gives it a wonderful, roasted flavor and also helps it puff up beautifully. Phulkas are usually oil-free, making them a great food for weight watchers. Tandoori roti: A tandoori roti is so called because it is baked in a tandoor, a clay oven also used to bake another famous Indian flatbread, the naan. Restaurants usually mix all purpose flour and whole wheat flour to make tandoori rotis. Ghadichi poli: A ghadichi poli, which translates from Marathi to a “folded roti,” is made using a special technique where the dough is rolled into a small circle, then oiled and folded twice. As the daughter of a Maharashtrian mom, this is the roti I especially love and I have included the technique for making this in my video here. My Marathi relatives made impossibly soft and silky butter-soft polis that could be crumpled like handkerchieves and torn into flaky, melt-in-the-mouth bits. Paratha: You are likely already familiar with stuffed parathas like Aloo Paratha and Mooli Paratha. But in north India parathas are also made plain. They are rolled out thicker and coated with ghee or butter, and often employ a technique similar to that used for ghadichi poli. Rumali roti: Mostly found in restaurants, this is an extremely thin, silky roti that can be folded so small, it was named a “rumali” or “handkerchief” roti. A rumali roti is usually stretched by hand and then cooked over an upside-down wok. Millet roti (often gluten-free): Rotis made with millets like jowar (sorghum) or bajra (pearl millet) are popular in some Indian cuisines and they are usually gluten-free. This means they cannot easily be rolled out on a surface and cooks usually shape them by slapping them between the palms of their hands before transferring them directly to the hot griddle. Rice roti (also gluten-free): A rice roti can be meltingly soft and delicious, but it is a somewhat difficult recipe to master. The rice flour is mixed with very hot water to make the dough, which then has to be carefully rolled out.
How to make roti
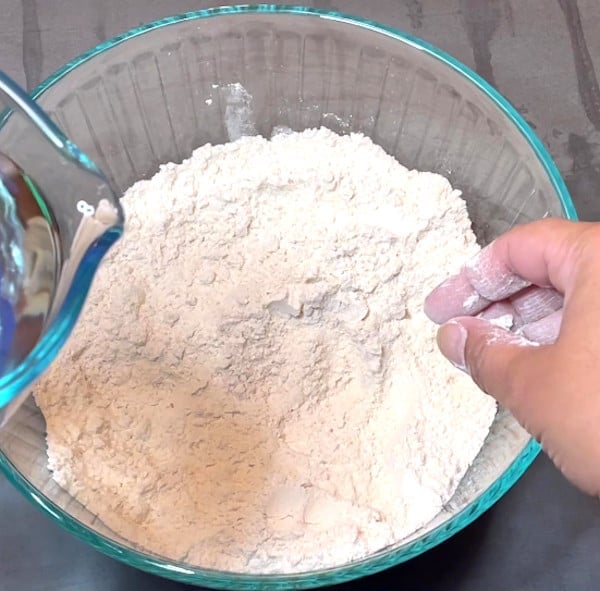
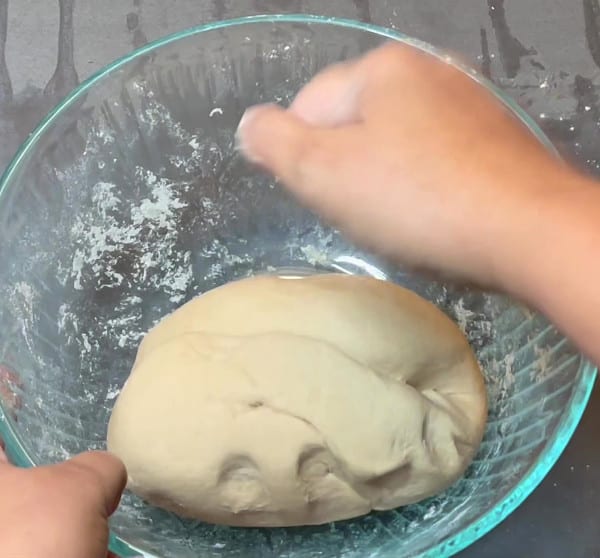
Make the dough: Place two cups of flour in a bowl (or the bowl of a stand mixer or food procesor with the dough blade fitted. If you are new at this I recommend just using your hands until you get a better sense of how the dough should feel). Mix ½ teaspoon salt into the dry flour. Trickle in water, a little at a time, until the dough comes together and is not sticky. Continue kneading for at least five minutes until the dough is really smooth and supple.
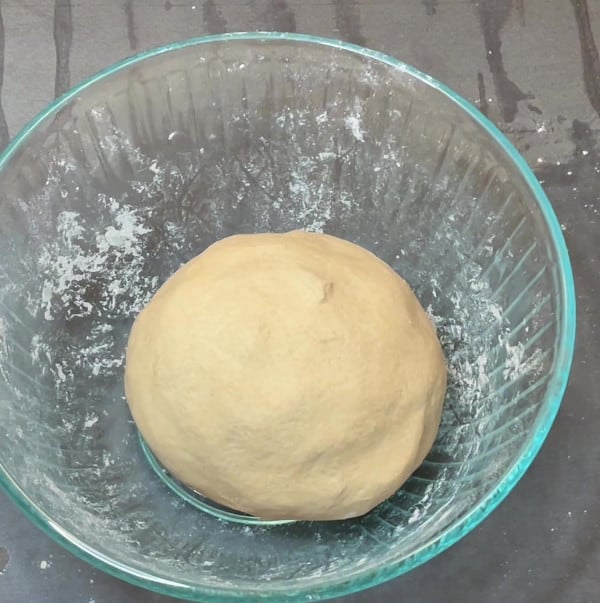
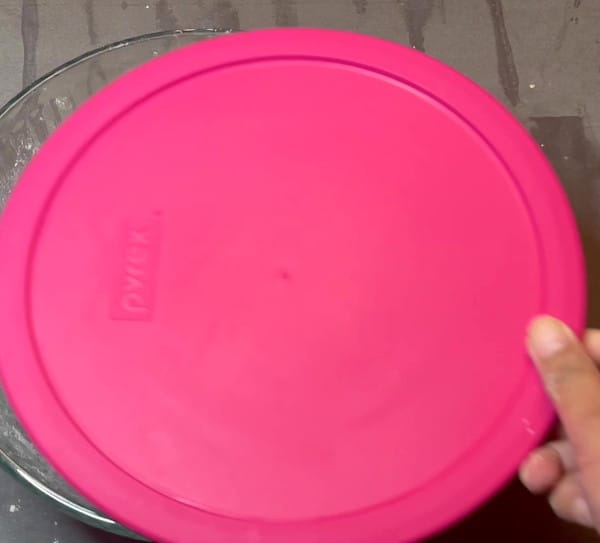
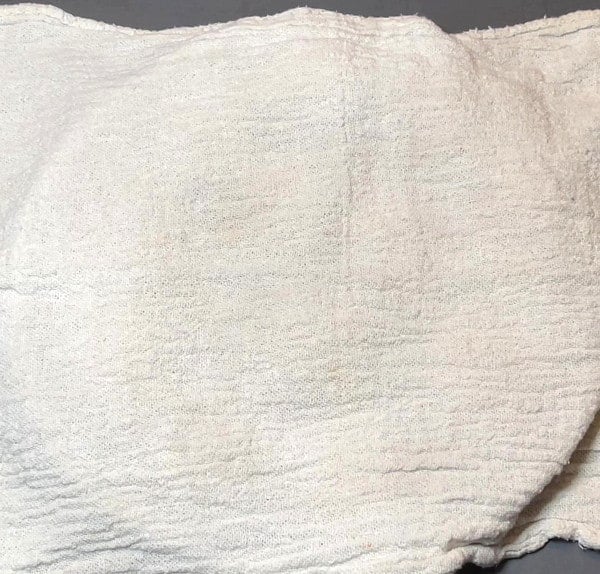
Rest the dough: Place the dough back in the bowl and cover with a tight lid or a damp kitchen towel or paper towel. Set aside for at least 30 minutes to an hour.
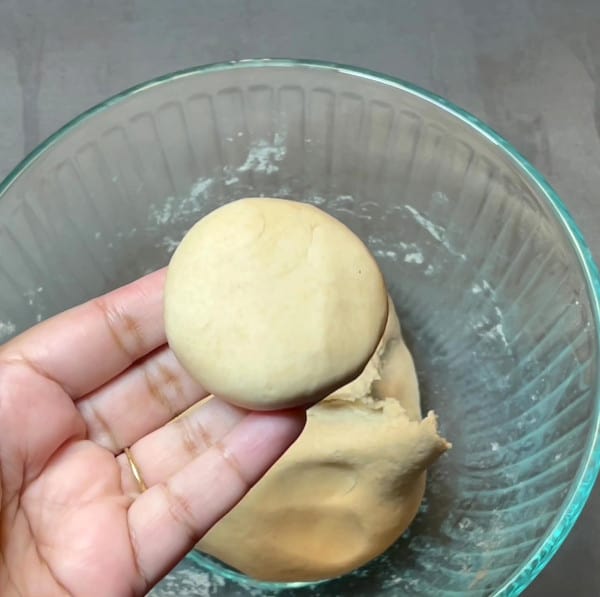
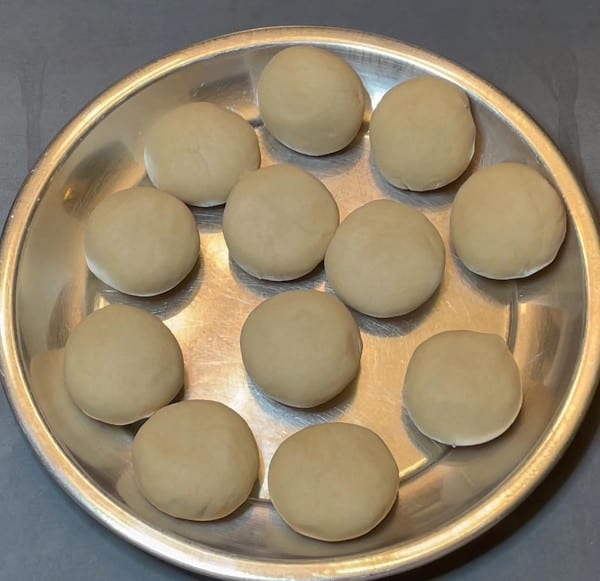
Divide the dough: You can make rotis large or small. I like mine between six to seven inches in diameter so I divide the dough into 12 balls. If you prefer smaller roti, make smaller balls of dough (you should also start smaller if you are new at rolling rotis). Keep the dough balls covered while you roll out each roti.
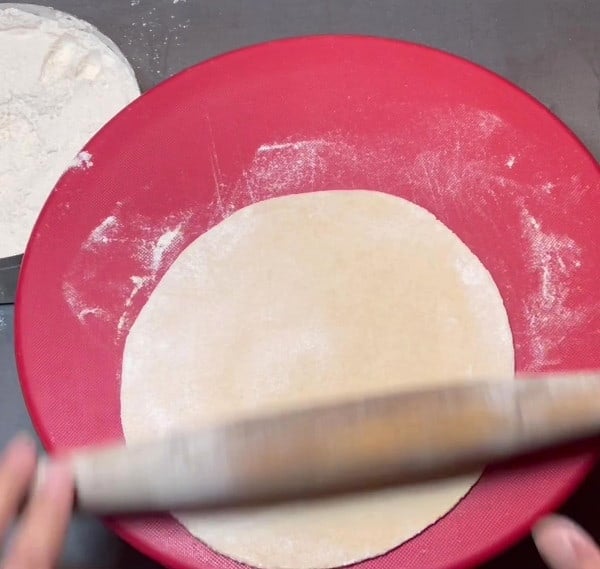
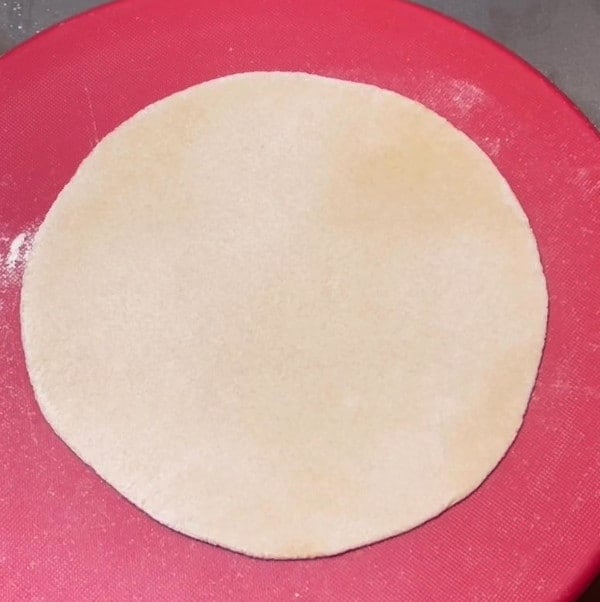
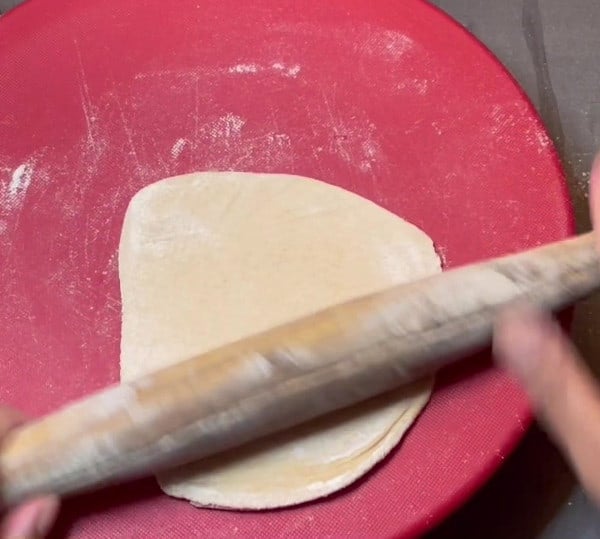
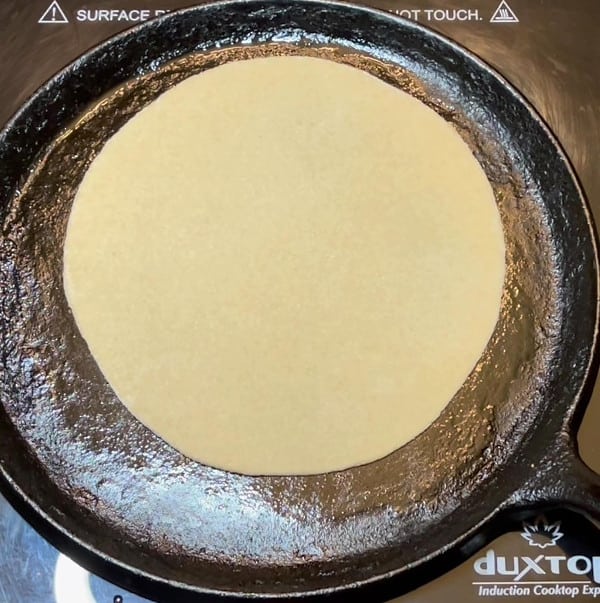
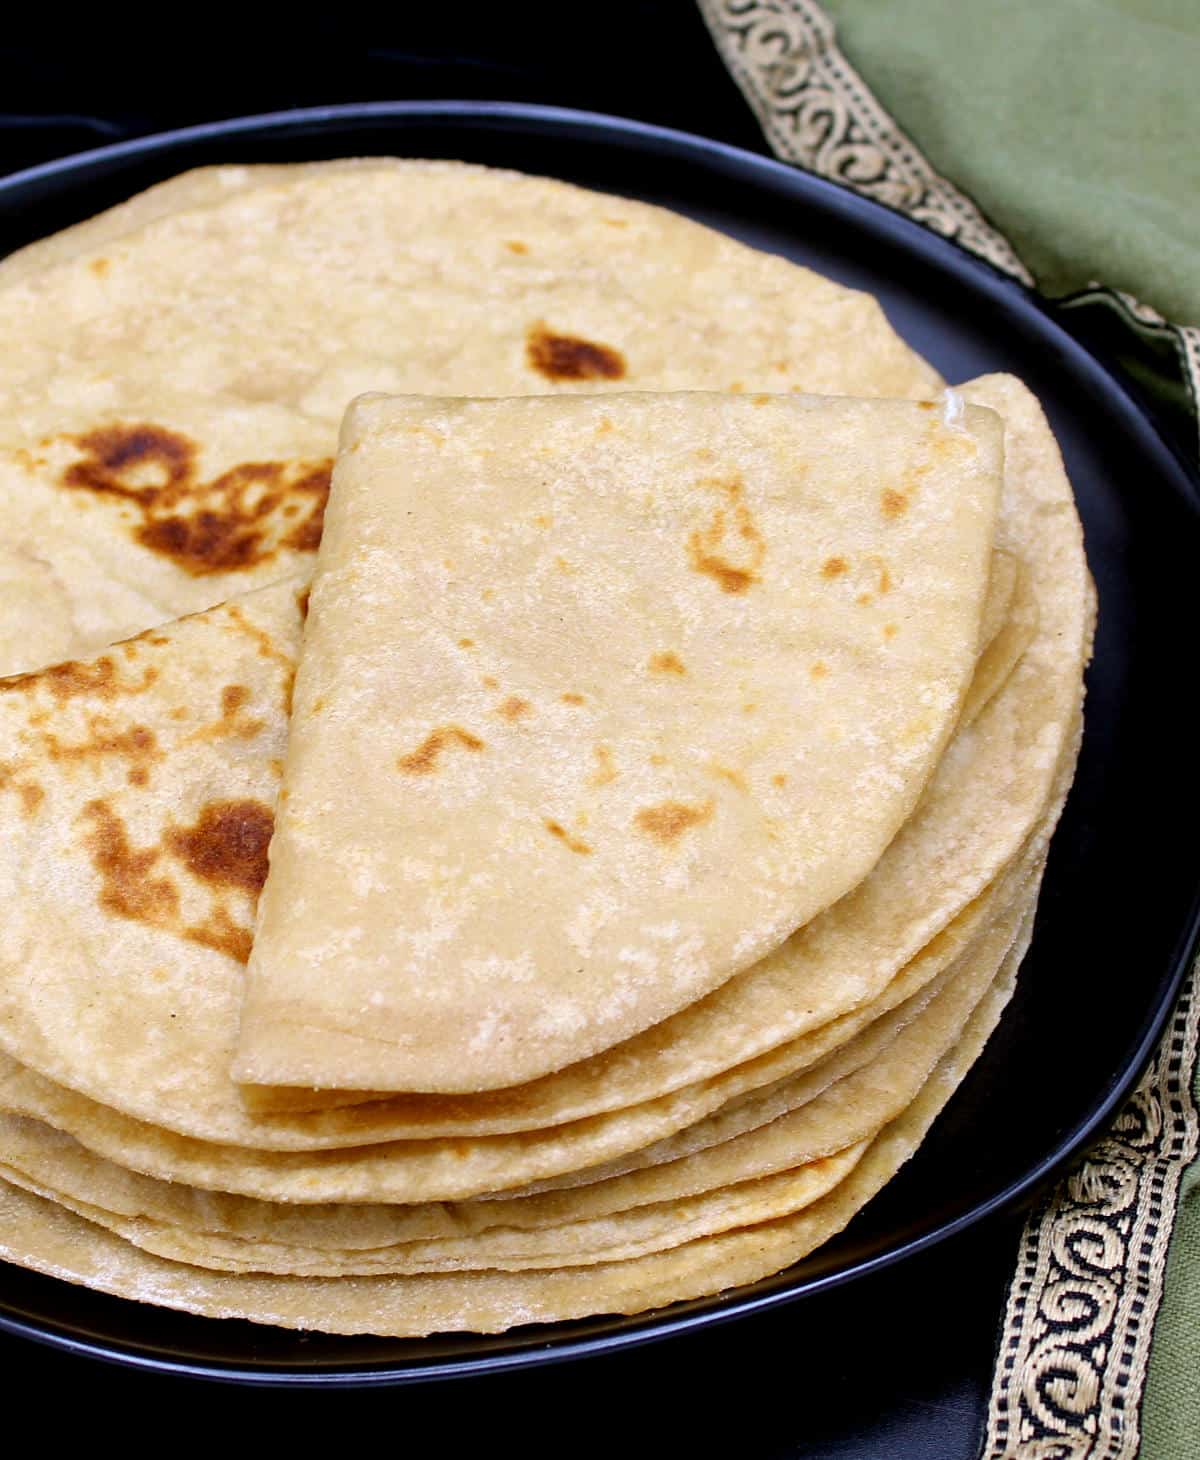
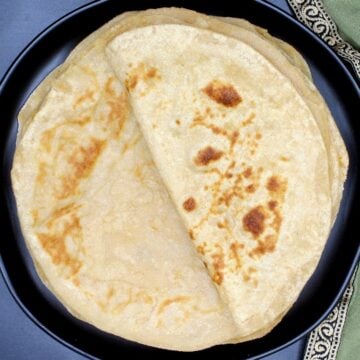
Roll the rotis. Using a rolling pin (one without ball bearings, remember?), roll the rotis into even and fairly thin – but not too thin – rounds. A very thinly rolled roti won’t puff up and will be stiff. See the expert tips below for more guidance on how to roll the roti and be sure to watch the video. I was working in an awkward position with the camera between my face and my hands so my movements are not as smooth as they should be for an experienced roti maker, but you’ll get the idea.
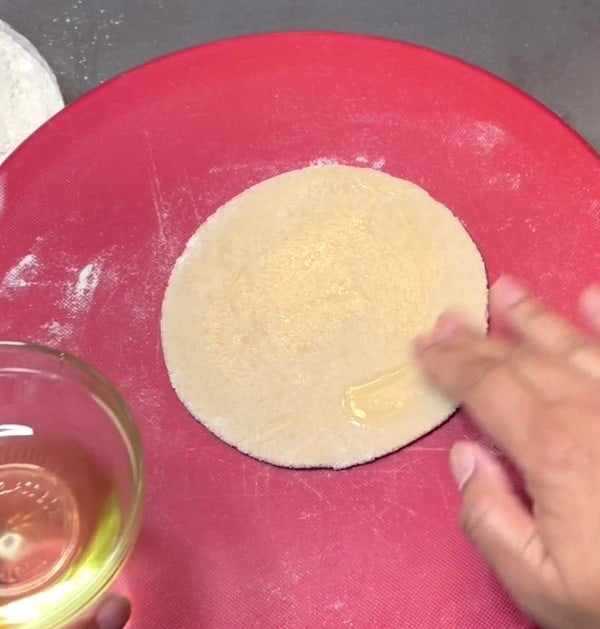
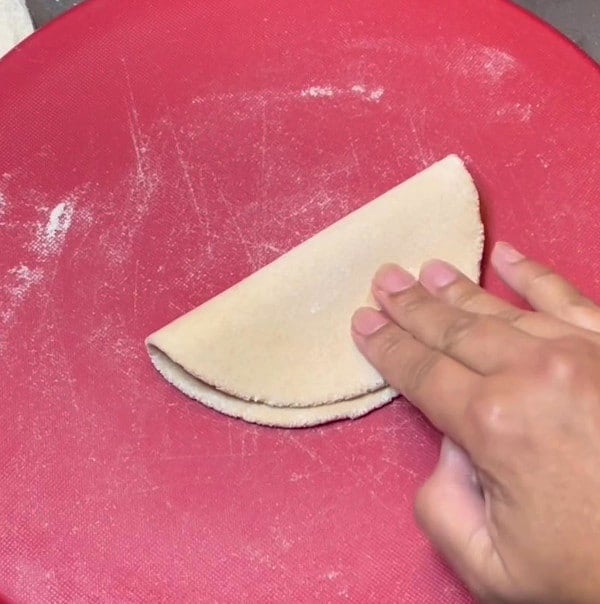
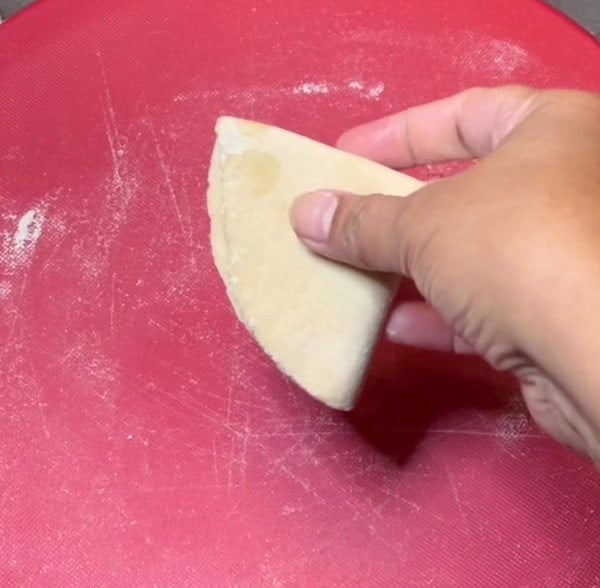
To make ghadichi poli, you need an additional step of oiling the dough, folding it, then rolling it again. Watch the video to see exactly how this is done.
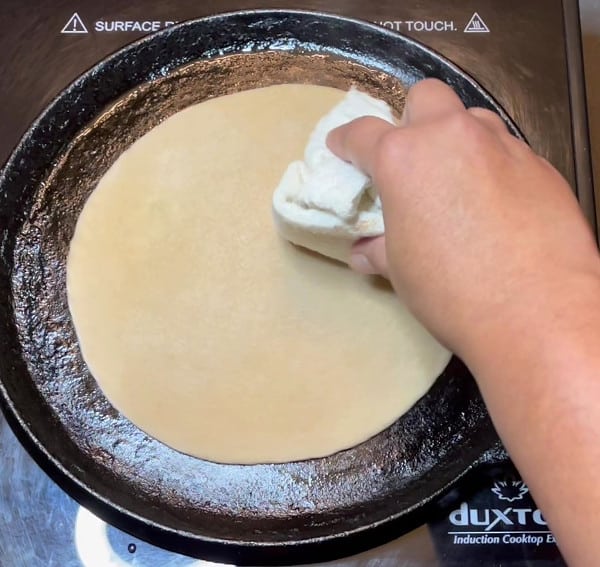
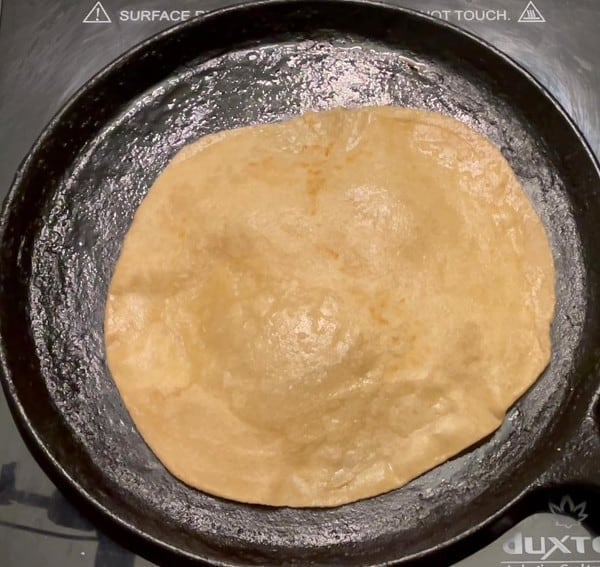
Heat the griddle. You need a flat griddle to bake the rotis (an Indian tava, which is made of very thin cast iron, or a comal, which is used for tortillas and is thicker, are both fine). Make sure the griddle is very hot but not smoking when you place the roti on it. There’s no need to oil the griddle. Roast the roti: Almost as soon as you place the rolled roti on the hot griddle you should see it turning opaque. Use a wadded up napkin or cheesecloth and carefully, making sure you don’t burn your fingers or use too much force, press down on the edges of the roti, moving it a little bit at the same time so it roasts evenly. If at any point the tava starts smoking too much, lower the heat. You can adjust it back up later if needed. In general a medium or medium-high heat setting should work fine once your griddle is hot.
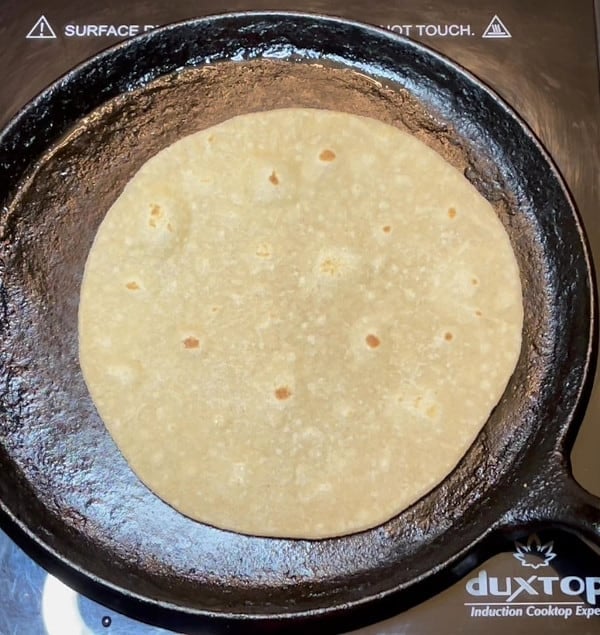
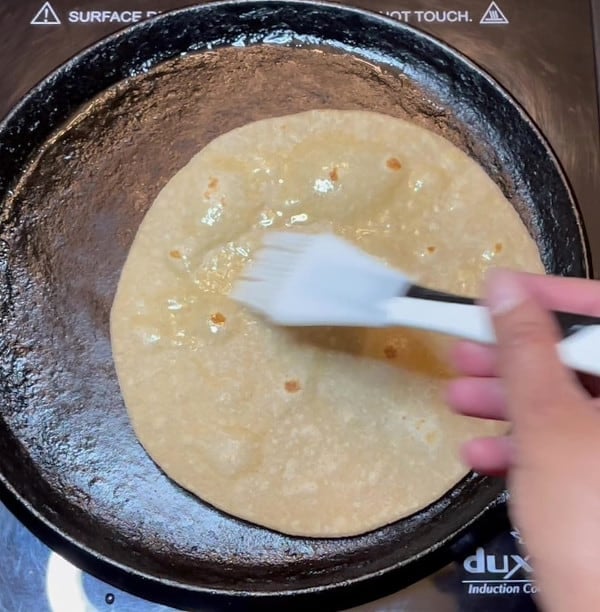
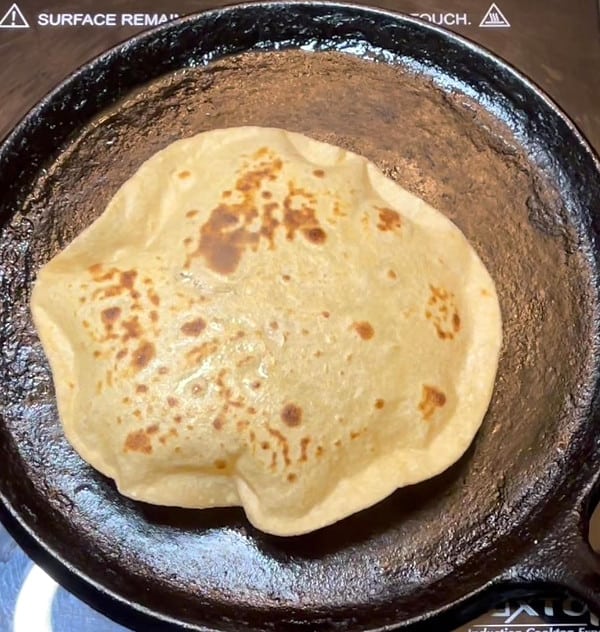
As soon as you see air bubbles form, flip the roti. Brush on some oil or some cooking spray at this point. Flip once more and continue pressing down very gently on the edges to help the roti puff up. Whether or not the roti will puff depends entirely on how evenly you rolled the roti. If you have very thin spots it won’t puff up. Take heart: you will get better at this with practice, and even if the roti doesn’t puff up it will still taste great.Flip one more time so the oiled side is up. Let the roti bake just a few seconds–you want some golden brown spots but you don’t want the roti to brown all over or become stiff.
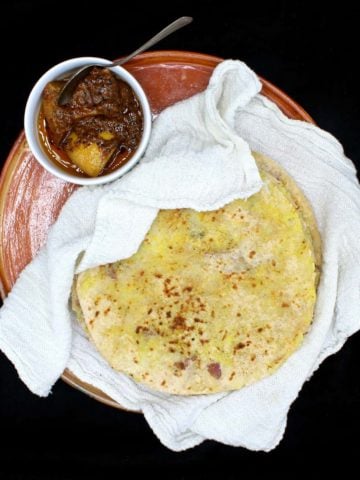
Keep the roti warm and soft until serving. To do this stack the rotis and wrap them in a soft kitchen towel that absorbs any steam. Preferably eat the rotis right after making them because they are softest at this point.
Serving suggestions
Rotis are perfect for scooping up spicy Indian curries, like vegan butter chicken, vegan palak paneer, vegan paneer butter masala, bhindi masala or baingan bharta. Check to get new recipe updates by email.
If you do make all the rotis beforehand, place the room temperature rotis, still wrapped in the napkin, in an airtight box and refrigerate for up to three days. You can also wrap the cooked rotis tightly in plastic wrap, place in a freezer-safe bag, and freeze for up to three months. Thaw and reheat on the griddle before serving. Roti is also delicious with dal. Try this delicious vegan dal makhani or dal tadka or masoor dal. I have dozens more Indian curries on my vegan Indian recipes page. Serve the roti and curry with a cooling vegan cucumber raita.
More delicious Indian flatbread recipes
Recipe card